|
Organize Photos
|
Auto Photo Organizer organizes and renames digital
photos by date picture taken, date modified, date created,
date accessed and file extension. The software is compatible with
photos taken by major digital cameras. Auto Photo Organizer
supports batch organization and is full compatible with Vista
and Windows 7 / 8.
- Add Files
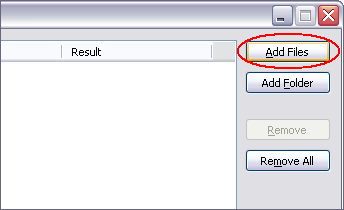
Click on "Add Files" to add photos or other files.
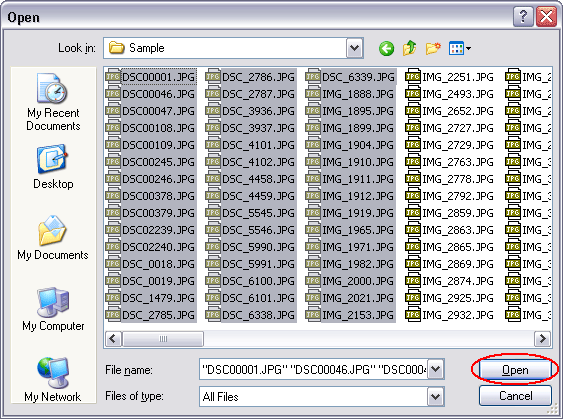
Choose photos or other files you need to organize, and then click "Open".
The software only only supports JPG file taken by major digit cameras,
but also supports raw image file taken by Canon (.crw, .cr2), Nikon
(.nef, .nrw), Sony (.arw, .srf, .sr2), Pentax (.pef), Olympus
(.orf), Kodak (.dcr, .k25, .kdc), Panasonic (.raw, .rw2), Fujifilm
(.raf), Samsung (.srw), Leica (.raw, rwl, .dng), Sigma (.x3f),
Minolta (.mrw), and so on.
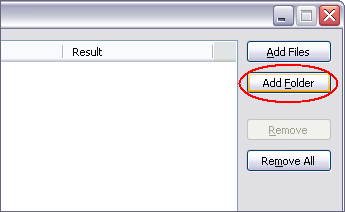
Another easy way to add files: click on "Add Folder" and then
choose a folder, the software will add any files in the folder and subfolders.
You could set extension filter for "Add Folder" at Options.
- Choose organization type
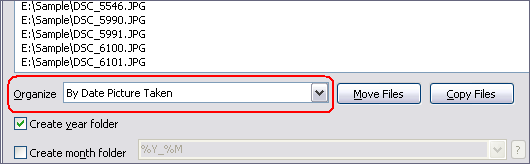
The software could organize file by:
- By Date Picture Taken: organize files by date picture taken.
- By Date Picture Taken, if not available, By Date Modified: organize
by date picture taken, if there isn't date taken (no EXIF information), organize
by date modified.
- By Date Picture Taken, if not available, By Date Created: organize
by date picture taken, if there isn't date taken (no EXIF information), organize
by date created.
- By Date Picture Taken, if not available, By Date Accessed: organize
by date picture taken, if there isn't date taken (no EXIF information), organize
by date accessed.
- By Date Modified: organize files by date modified.
- By Date Created: organize files by date created.
- By Date Accessed: organize files by date accessed.
- By File Extension: organize files by file extension.
- Set organization options
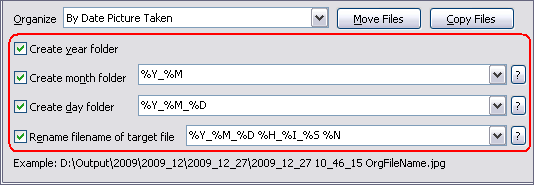
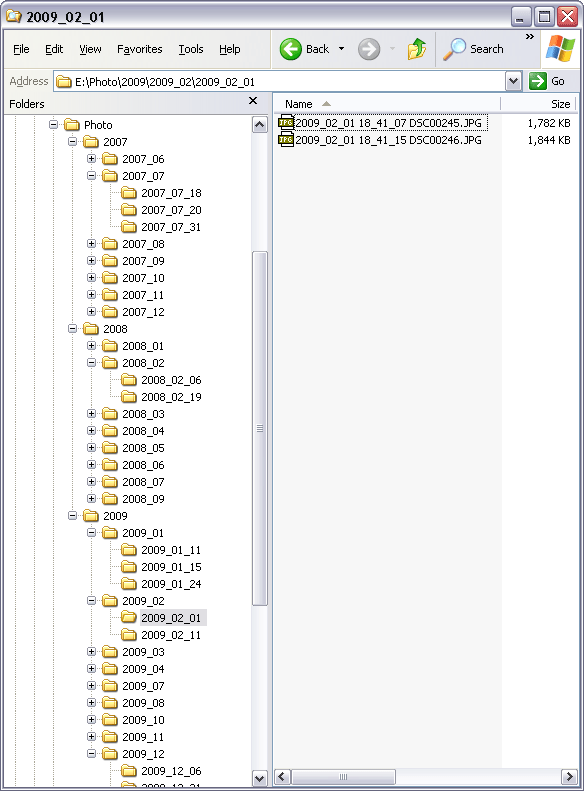
You could enable the software to create year, month, and day folders, and rename
filename of target file. Tags in folder and file name are described below.
- %Y: Year (e.g. 2010)
- %M: Month (01-12)
- %A: Abbreviated month name (Jan, Feb, Mar, ...)
- %L: Full month name (January, February, March, ...)
- %D: Day (01-31)
- %H: Hour in 24-hour format (00-23)
- %J: Hour in 12-hour format (01-12)
- %I: Minute (00-59)
- %S: Second (00-59)
- %P: AM or PM
- %N: Name of original file
- Set output folder
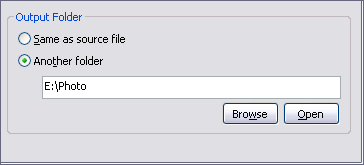
You could set the software output files to same folder of original file, or another
folder.
- Organize files
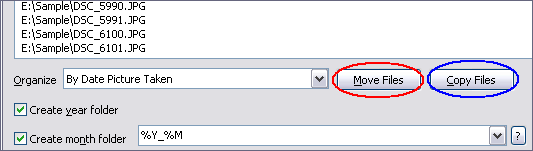
Click on "Move Files" to create folders and move files to target
folder (original file will be deleted)
Click on "Copy Files" to create folders and copy files to target
folder (original file will be kept)

The software is organizing files.
- Outputted folders and files
Top
|